Microcontrollers for everyone
Part 1: Introduction — Documentation and Toolchains
Motivation
Let’s imagine you have found somewhere on the internet a new microcontroller. You ordered the evaluation kit . It arrived safe and sound. You unpacked the box, provided the power, the evaluation board did the best blinking LED ever on earth. Then, you wondered, what next?. I am pretty sure, you would go online, google something like “how to program xyz microcontroller”, “example of microcontroller abc”, “which IDE do I have to install?”, or “can my evaluation kit eventually fly ?”,etc. Sometimes you succeeded, sometimes you failed, but in the end, the evaluation kit was left stranded in the corner of your tool box and you swore to yourself that you would never ever buy another evaluation board (I am sure you will do it anyway).
When you look for tutorials on how to program a microcontroller on the internet, it is no doubt that you will find hundreds or maybe thousands of them. Most of the tutorials will tie you to only one platform, even though, there are a lot of microcontrollers on the market, and each microcontroller vendor offers a different set of toolchains.
Therefore, this series will not show you how to be a better C programmer or becoming a master in one microcontroller, but it shows you a general approach on how to work with a microcontroller, and then, you can apply the knowledge to any microcontrollers without blindly google everything.
Choosing a hardware
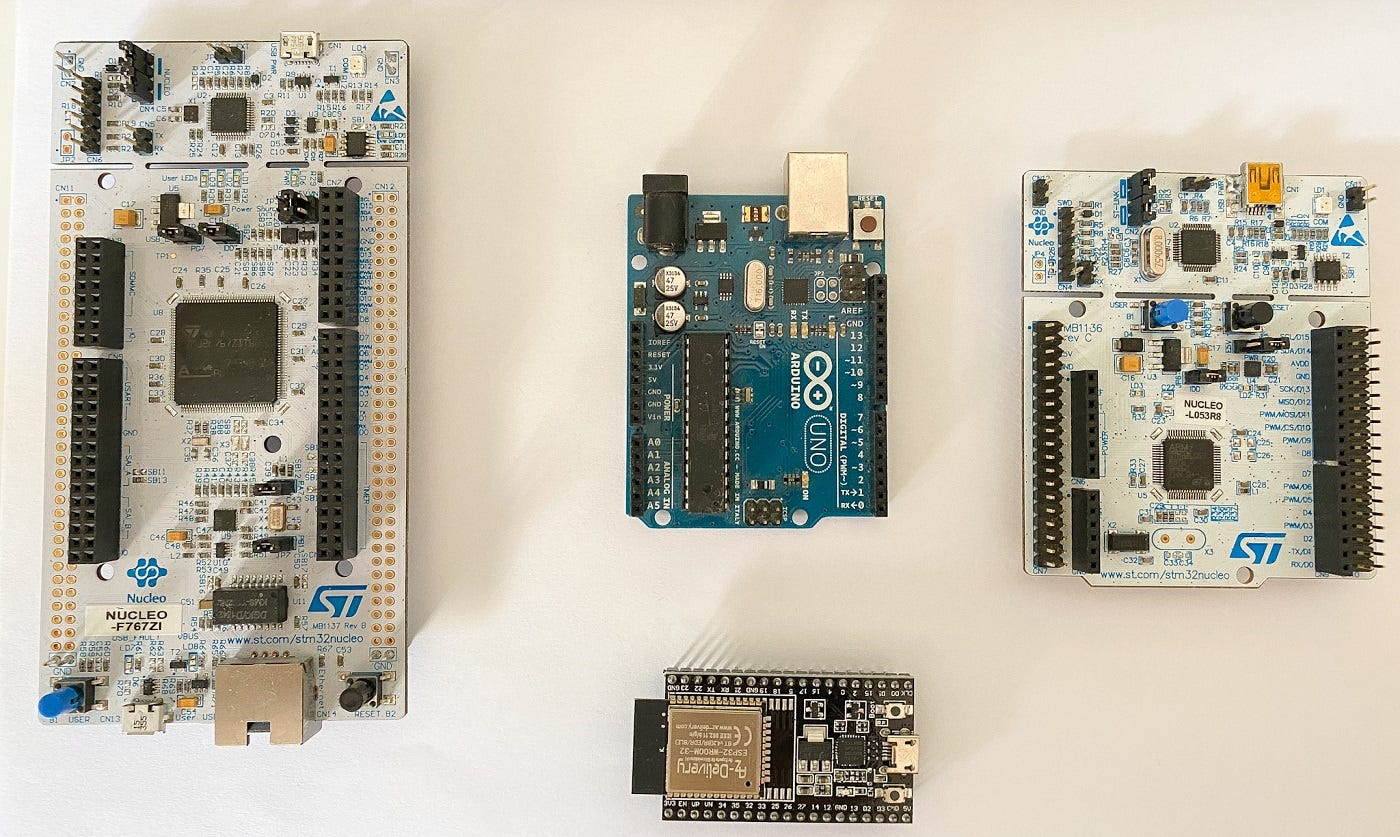
To continue with my idea, I need an evaluation board. I will use the NUCLEO-L053R8 board from ST (link). The reasons are:
- The microcontroller on board is powerful enough for our use case (It is an ARM-cortex M0+, 32-bit controller).
- The toolchains and libraries offered by ST are very good.
- It has an onboard debugger, repeat DEBUGGER.
- The documents of the board is pretty decent and they are directly coming from the vendor.
- Last but not least, it is…dirt cheap!!!
It’s all about the documents
After choosing the hardware, what is the next step?
The answer is we collect the documents, which normally are user manual, schematic, datasheet, reference manual, errata sheet and application note.
So…what exactly those documents do?
A board user manual describes jumper settings, pin header, pin name, etc. of the evaluation board. For the NUCLEO-L053R8, it can be found here.
Next, we need datasheet, reference manual and errata sheet.
- The datasheet describes the electrical/temperature characteristics, clocking, packaging, and basic peripherals’ functions of the microcontroller. You need this document when you have to do some hardware design or when there is smoke on your board :) . The datasheet of our board can be downloaded here.
- The reference manual describes in detail every aspect of the microcontroller, e.g. clocking tree, boot process, ADCs, DACs, Timers, etc. The information of the registers are also described there. We need this document from time to time when we work with a specific peripheral.
- Errata sheet describes the errors happening on the microcontroller and workaround. Errors could come from software, hardware or even silicon level. Normally, we don’t need this document, but when there are some issues that unsolvable, it is a good practice to check the errata sheet.
Application note describes a typical application of the controller, for example, bootloader, motor control, IoT, etc.
That was a lot for the paper stuffs. I suggest you download everything and put them in a folder.
Toolchains
IDE
If you manage to this point, I suppose most of you may know already what an IDE is? If you are not, please take a look at wikipedia. Basically, a good IDE includes these functionalities:
- Text editor, where you write you code. Color scheme and dark mode would be nice but not important.
- Compiler/assembler: checking syntax errors and translating your code into machine code.
- Linker: checking linker errors (it will annoy you if you have missing files, undefined or duplicated variables) and linking your object files into a single file.
- Programmer: program the application to the microcontroller.
- Debugger (optional), if your evaluation board has a debugger, your IDE allows you to debug your code, e.g. set breakpoints, check register values.
Now, there will be a hardcore Linux + GNU guy says “Wait! I don’t need an IDE. I can use basically any text editor, write a Makefile, and using GNU compiler to compile the code”. Yes, you are absolutely correct. But let’s keep in mind that you need to spend a lot of time to write your Makefiles. I am a simple man, I see good IDEs, I use them.
Each microcontroller vendor provides a wide variety of IDEs, they can be grouped into:
- Not-free IDE. They are, of course, not free-of-charge because they have a good compiler, support a lot microcontrollers, error free (aka working like a charm). Besides basic feature as mentioned above, they usually includes a lot of profiling tools. Keil and IAR are popular among them. Normally you can use these IDEs for free under the condition that, your application is under a certain size.
- Free IDE. In order to complete their microcontroller ecosystem, which is software tools, hardware tools, BSP, SDK, etc., the microcontroller vendors provide also free tools. Most of them are Eclipse IDE based and with integrated gnu compiler.
Pro tip: Keil is free if you use it with the ARM Cortex M0+
Back to our STM32L0 microcontroller, ST offers many IDEs: link. But we will focus only on the newest free tool, which is STM32CubeIDE. STM32CubeIDE is an IDE + Code generation tool. What is a code generator? Why we need it?
Code generator
If you have already worked with a microcontroller before, you will know that:
Before programming your application, you have to write a start up file, initialize the clock tree, initialize the peripherals, write the drivers, etc. Not to mentioned, if you want to use USB, Ethernet or Graphic, the workload is even bigger.
Most of the Arduino fans don’t experience it because that process is done and transparent to them. But configuring the peripherals is one of the most important parts of the microcontroller because you will have the full control of your microcontroller.
Luckily, most of our lovely vendors are aware of this situation so most of them provide a graphical tool to help us doing the configuration, and that tool will generate the code to an IDE (mentioned above) of our choice.
Peripheral drivers - To abstract or not to abstract
I also want say some words on this topic, there are many ways to program a microcontroller. The most respected way (effective or not is another story) is doing everything from scratch, program registers directly, plus using assembly. Another way of doing is using C library provided by vendors, either as stand-alone library or integrated into code generation tool.
For ST, they provide multiple libraries — STM32 Snippets, Standard peripheral library, Hardware Abstraction Layer (HAL) and Low Layer (LL). The first two are obsoleted so they support only the HAL and LL.
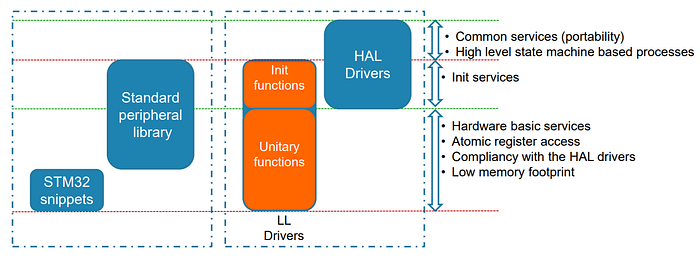
Hardware abstraction layer (HAL) provides us a high level, high abstraction library. It means the library is common for every STM32 family. When using the HAL library, you will see that, the functions, processes are the same for every microcontroller. This means you will move away a bit further from the hardware-dependent code. It is working but you don’t really know what is the black magic behind. Talking about commonalities, the functions of HAL library always have the same format:
HAL_Peripheral_Action(parameters);
/* for example */
HAL_GPIO_Toggle(GPIO_Port, GPIO_Pin);
and guess what, you can send some bytes through the UART interface by calling:
HAL_UART_Transmit(parameters);The benefits of the HAL library is, it provides a fast way to prototype your idea. Besides, this library will fit more to a complicated peripheral like USB.
But the drawbacks are, because of high abstraction level, the library is not very well optimized, so you will lose performance.
To work around that issue, ST introduced a library called Low Layer (LL). Using the LL library means you will “work” in the register level. The good things is, ST have already define all the registers as macros and using inline functions to do the bit masking, so the the functions are more intuitive to read. If you go deep inside the library, it is nothing but a bunch of bit masking.
The drawbacks will be, because you are in the register level, you have to understand the hardware, i.e. you have to consult the reference manual a lot.
In the name of learning and so on, we will use the LL. If you have already catch my idea, you will ask yourself “where can I find the library? And more importantly, where can I find the document of the library?”. Everything is included in the STM32CubeIDE
Software installation
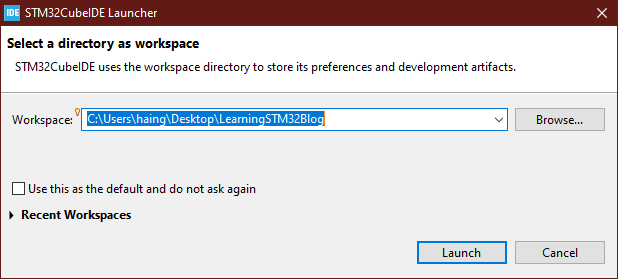
As mentioned before, ST has integrated their toolchains to all-in-one tool, which is called STM32CubeIDE. STM32CubeIDE can be downloaded here.
The installation process should be straight forward enough. when you start the program, it will ask you to choose a workspace. You can either choose the default one or create a new one as me.
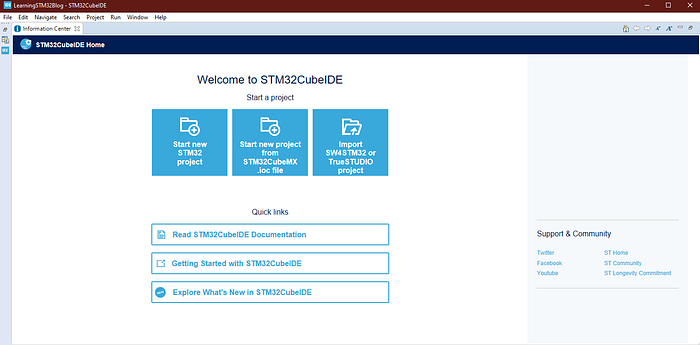
After clicking on the Launch button, you will be prompted to the main interface of the IDE as followed:
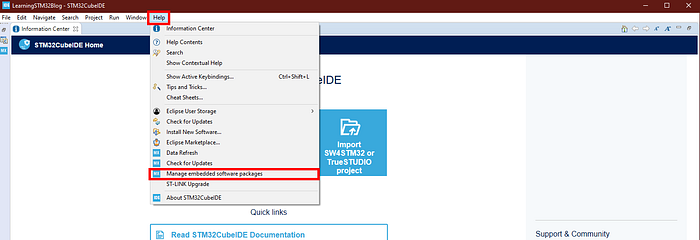
we will proceed to download the software package for our microcontroller. Click Help → Manage embedded software packages
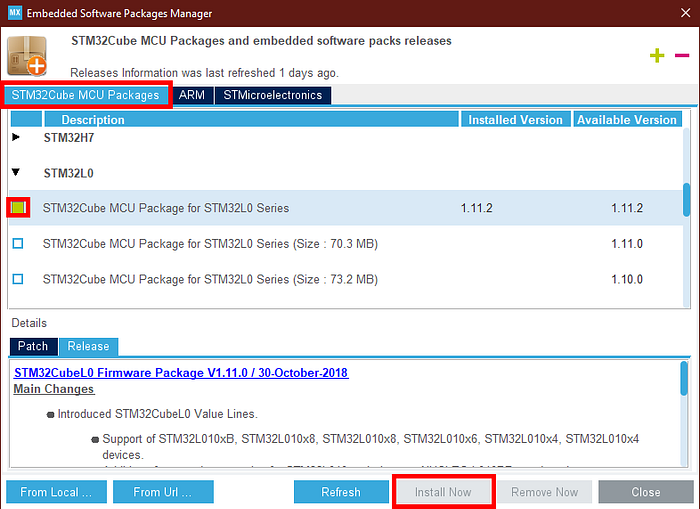
You will be prompted to a new window, which allows you to choose the software package. Since we are working with the STM32L0 family, we choose the newest software package version from the STM32L0 family and click install now (I have done this already so the Install Now option is not available for me).
CubeIDE will automatically download all the libraries required to program the STM32L0 microcontroller + documents for you. CubeIDE, by default, stores the downloaded packages at:
C:\Users\your_user_name\STM32Cube\Repository\STM32Cube_FW_L0_Vx.xx.x.
When it finished downloading, you can go there and have a look.
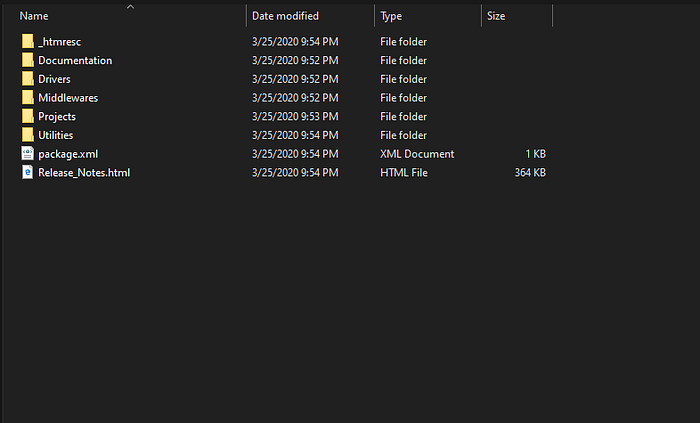
At this point, you don’t have to worry too much what is the content in the software package.
The only important thing is, if you go to Drivers → STM32L0xx_HAL_Driver, you will find a file called STM32L073xx_User_Manual.chm, which is the document for HAL and LL libraries.
Alternatively, the document can also be found in pdf format here.
Summary
There are a few things mentioned is this article, but to summarize everything, you need to remember that, whenever you start with a new controller, you need the following things:
- Documentation
- A good evaluation board, i would suggest take the one from the vendor.
- Toolchains: IDE and/or a code generator
- Which library you want to use: to abstract or not?
Next step we will talk about General Purpose Input Output (GPIO) and write out first application-Blimking LED.
Stay safe in this Corona Time, and Happy Coding!